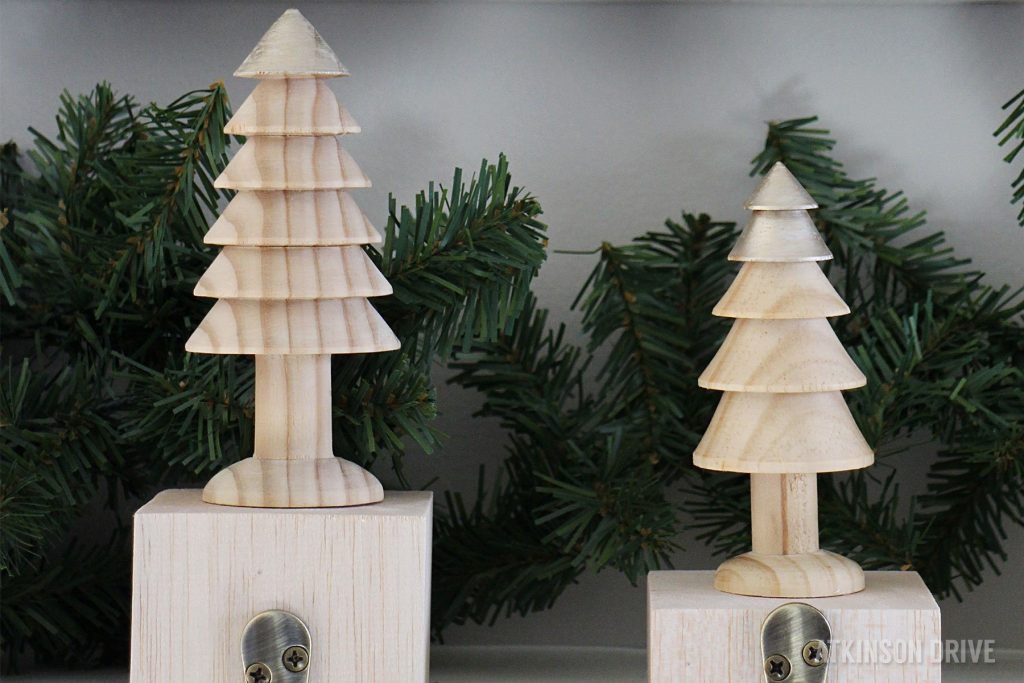
I am obsessed with how versatile and simple this project is. You really can make stocking hangers that are exactly your style!
Here’s what you’ll need to make your own stocking hangers:
Wood (I purchased a Balsa wood block at Hobby Lobby)
Decorative Toppers (These pine trees are what I used)
Robe Hooks (Like these)
Wood Glue
Paint (optional)
1. First, you’ll need to cut the wood down to size. If you don’t have a saw, you should be able to purchase wood pieces that are the size you’d like – or you can have the local hardware store cut it for you. I opted to go with different heights for my stocking holders. I think it adds a whimsical look … like a forest!
2. This is the point when you’ll want to paint the toppers or bases if you want. I personally love the natural look of the wood, so I decided to paint just the tops of my trees with a metallic paint. Since I didn’t have any gold paint on hand, I used my “Good as Gold” nail polish. I know it sounds silly, but it was fantastic and dried almost immediately!
3. Once the pieces are all dried, you can install the robe hooks. Just make sure you place them high enough up that the wood will lay flat on your mantel (or wherever you put your stockings).
4. Using wood glue – or something else that has a strong hold – stick the toppers on to your bases.
The Balsa wood that I purchased is really light. It’ll hold the stockings when they’re empty, but there’s no way it’ll hold when they’re full of goodies! So, I used some indoor mounting squares to stick the holders to the mantel.
This is a great DIY project to help save money for the holidays. Plus, you can get the whole family involved and add a personalized touch to your Christmas decorations.
This is Day 1 of our 12 Days of Christmas Decorations series … check out all of the posts here.
linking to these parties


 Loading...














Wow! I’m so impressed! Those are awesome! Pinning to the Mond
Oops….Pinning to the Monday Funday board!
Thanks Katie!
Such a great idea! I love the natural look, but I bet they would look great painted too. Thanks for sharing :)
I know! I’m thinking of making a few more just to see how adorable they are painted in bright colors!
These are very cute Sam!! I never would’ve thought of this idea! Such a nice addition to a rustic or natural decor theme :)
Lindi @ http://www.lovecreatecelebrate.com
Thanks Lindi! :-)
What a cute idea! Love the natural look! We are featuring them tomorrow at Outside [The Box] link party!
Thanks so much Megan!
Really dig those wooden trees, and the cost savings really couldn’t be beat!
I’d also like to thank you for linking up to Outside [the Box]. Congrats on being featured this week at Outside [the Box]!! Y’all come back now, ya hear? Tuesdays @ 5pm EST: http://bit.ly/BlackAndWhiteObsession
Sam, what a cute idea! Thanks for sharing with us this week at Throwback Thursday!
Mollie