Last week, I had the immense pleasure of being able to write a guest-post for Delightful Deets. Congratulations are in order because Mrs. J just had a beautiful baby girl! In honor of her new baby, I wrote a tutorial on how to paint onesies…check it out!
I’m not sure if you’ve noticed, but it seems the 80’s is on it’s way back in…These painted onesies might be leaning that way, too. But I say they’re adorable none-the-less {especially with a pair of leg warmers}.
As you might remember, my brother & sister-in-law just adopted a baby girl {the first girl in our family} and I had the immense pleasure of throwing her welcome-to-the-family sip & see party! The theme is what I am calling Pink Safari; and the main colors are pink, mint/robins egg blue, and yellow. I love these colors together, I think they’re so fresh and fun. CLICK HERE TO VIEW THE PARTY DETAILS.
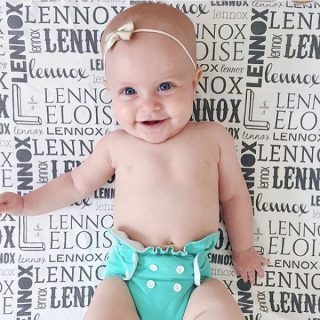
*Here’s a picture of the hubs with my new niece {and one of her onesies}…so adorable!*
While I was in early party planning mode, I decided that I had to make an outfit for the party girl. Her mom had already made some precious tulle tutus, so I tasked myself with making a onesie to match {and maybe a headband…and some barefoot sandals…}.
I don’t know if I’m way behind the ball on this one, but just a few weeks ago I discovered that Martha Stewart has a paint additive to transform regular acrylic crafting paint into fabric paint! It is a bit pricey {but totally worth it}, so I didn’t buy it at the time; it got stored in my mental-notes, though. Unfortunately, when I went back to purchase it for this project, Michael’s was out of it!!! Good-to-know – they also keep some in the painting section {you know, the one for artists…where the canvas is}. It’s not Martha Stewart, but it does the job very nicely!
What You’ll Need:
White Onesies {I purchased a pack of 5 for $10}
Painter’s Tape
Cardboard {to put inside the onesies}
Acrylic Paint {I used Craft Smart in Robins Egg Blue, Pink & Yellow}
Fabric Painting Medium
1. Wash the onesies first…not only is it good for the little one’s skin, but it ensures that the paint won’t warp later when it gets washed. Since the onesies were wrinkled after washing, I also ironed them out.
2. With your painter’s tape, mark the pattern you want to paint on the onesies.
I haven’t tried this yet, but I would assume that {if you own one} you could cut vinyl on your Silhouette and use that to make your pattern. I wanted to go for the ‘abstract’ 80’s look, so the painter’s tape was perfect!
3. Using approximately a 1:1 ratio, mix together your paint and the fabric painting medium. Then go to town creating! Remove the painter’s tape while the paint is still dry & fix any uneven lines.
4. Wait for the paint to completely dry, and run a hot iron over top. According to the fabric painting medium, this is how to set the paint. *Note: Check the directions on your specific bottle of medium as they may differ from brand to brand.
All that’s left is to fold and wrap the onesies to give to your favorite infant. These are the perfect baby shower gift, because they’re so practical yet adorable and uniquely you!
The greatest thing about this project is that you can make crafts to match your creations.
I hope you enjoy making your own painted onesies…I had a great time sharing with you!
Linked To & Featured At:




 Loading...











What a cute idea! You did such a nice job! And an adorable niece, too.
Thank you! I think she’s pretty cute! :-)
I love this project! I’d love it if you’d join me on my T.G.I.F. Linky Party that I host every Thursday evening – Sunday.
http://www.craftjunkietoo.com/2012/09/tgif-linky-party-65.html
Hugs,
Tracy
Linked up…thanks for the invite!