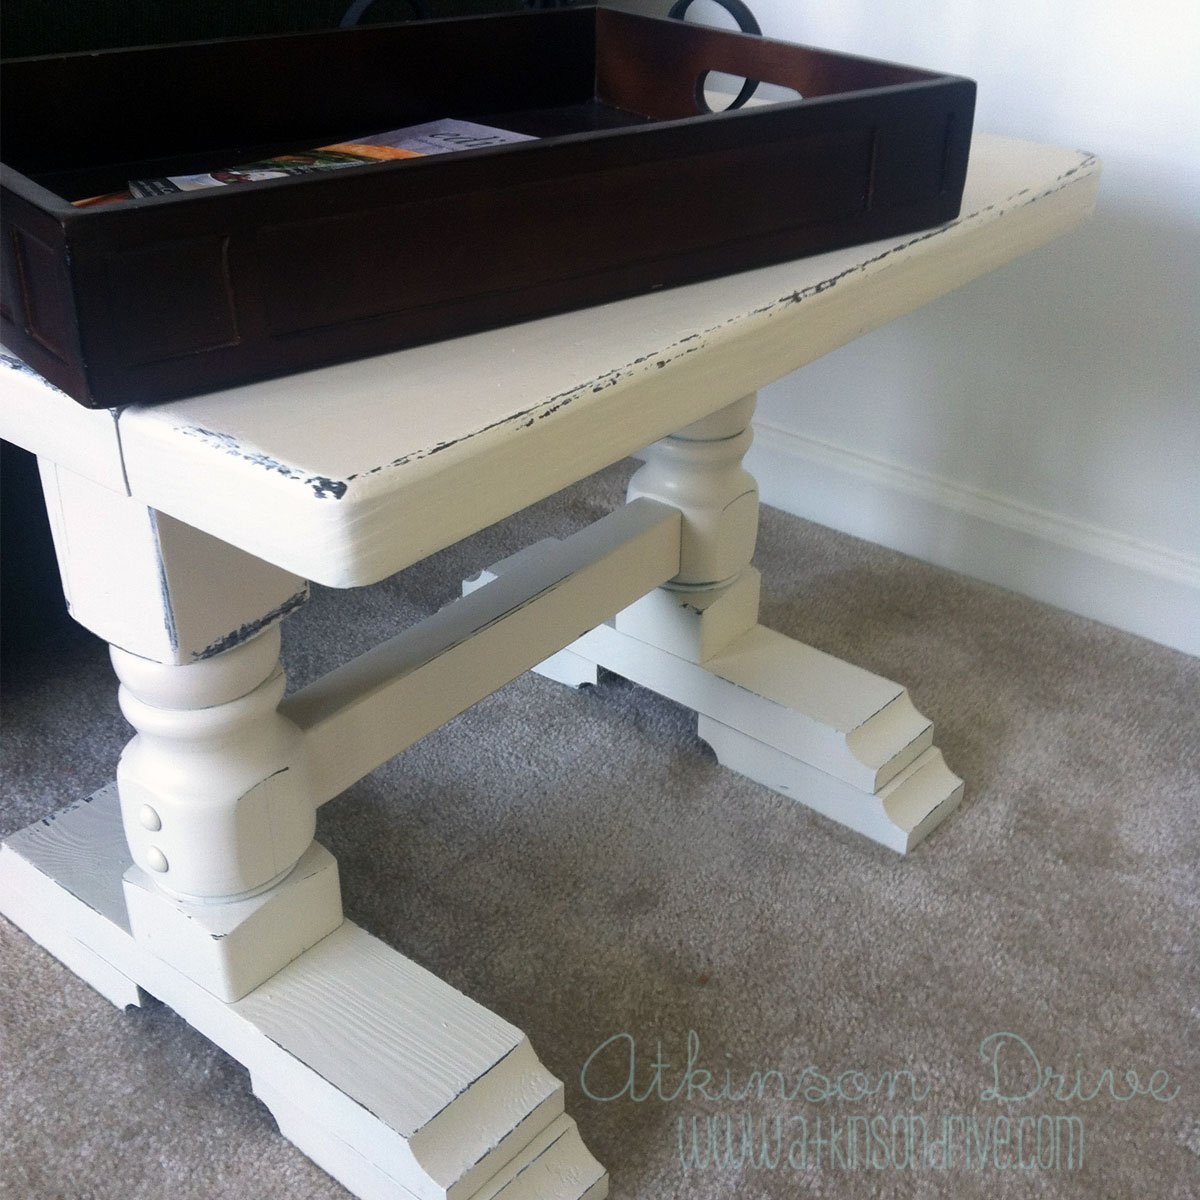
I found this pair of 70s-style side tables at Goodwill for $10 – what a steal! I couldn’t pass up such a bargain, though I was getting a lot of flack about these ‘ugly’ tables from the husband {he just doesn’t see the potential in less-than-beautiful furniture}. In the end I won because, let’s face it, I could be asking for something that costs a lot more than $10.
These tables are going in two different rooms in the house, so I decided to go with two different finishes on these sister side tables…read on to learn more!
Tools & Equipment You’ll Need:
2 ‘ugly’ tables
2 cans of spray-on primer {Rustoleum Painter’s Touch Ultra Cover White Primer}
2-3 cans of spray paint {Rustoleum Painter’s Touch Ultra Cover in Satin Heirloom White}
1 can of wood stain {Minwax Wood Finish in Jacobean 2750}
Paint Brush
Candle
Electric Sander
Fine grit sanding block or paper
Newspaper & tape
My main painting-method was inspired by Whitney over at Shanty 2 Chic. She uses candle wax to make distressing furniture easier…so brilliant!
Prep: Sand your table if you feel it’s necessary. The finish on my tables was still in pretty good condition & I wanted the dark color to show through the paint when distressed, so I didn’t sand.
Table #1
1. Thoroughly wipe down the table with a damp cloth so it’s as clean as possible. When it’s dry, rub your candle over all the edges of the table that you would like distressed. Lightly wipe the excess candle remnants off the edges with a dry rag.
*Note: make sure you don’t rub too hard, because you need the wax to help you distress the paint later on.
2. Following the paint can directions, prime and paint your table. Since my tables were dark they required 2 even coats of primer and 1 coat of paint + a few small touch-ups. Let the table cure according to the paint label (usually around 24 hours).
3. Using your sanding block, lightly go over the edges of your table where you wiped the candle wax. See how easy the paint comes off?! This leaves you with a nice, distressed finish.
4. Now put your table in a prominent place where you can show it off! Even take some pictures if you fancy…and hope you end up with a photo bomb this adorable.
Table #2
1. First cover the top of your table with newspaper and tape so you don’t spray it.
2. To paint the bottom of the table follow steps 1-3 above.
3. Remove the newspaper from your table top and sand the ugly ‘vintage’ finish off the beautiful wood. Vacuum and wipe down the table top so you have a clean surface to work with.
4. Apply your wood stain according to the label directions. Let dry completely.
5. Marvel at your glorious new table top!
I hope you, too, can find a pair of ugly tables and make them beautiful again; feel free to share your projects with me!
sam {at} atkinsondrive {dot} com
Linked To & Featured At:









 Loading...






















I love the table! The distressing is perfect. Thanks for linking up at Doodles & Stitches.
Thanks for hosting! This method is by far my favorite…it turns out so well and is really easy!
They are lovely! I never heard of the candle method. What a great tip! Thank you for linking this up to Rustic Restorations Weekend!
Thank you for sharing your lovely projecy at Potpourri Friday!