Not only are tree skirts these days incredibly expensive – I saw a felt one for $40 the other day – but they’re mostly uninspired. I haven’t found anything eye catching, unique, or rustic. Homemade is the way to go!
Here’s what you’ll need to make your own tree skirt:
1+ Yards of Felt
3+ Yards of Burlap
Hot Glue & Gun
Scissors
1. The size of your tree skirt will depend on how large your actual tree is. I decided to make ours just a little larger than the base of the tree branches … so 4 feet. This is what will determine how much felt you need. Since the felt will be the tree skirt base, purchase enough to make a circle as big as around as you want.
2. When you’ve determined how large you want your tree skirt to be, draw a circle on your felt and cut it out. Inside the larger circle, you’ll need to make a smaller one that fits around the base of the tree. Mine was about a foot, but ended up being bigger than I needed it to be. Cut out the center circle, and then cut a slit from the outer edge to the middle. This is the slit that will allow you to easily place the skirt around the tree base.

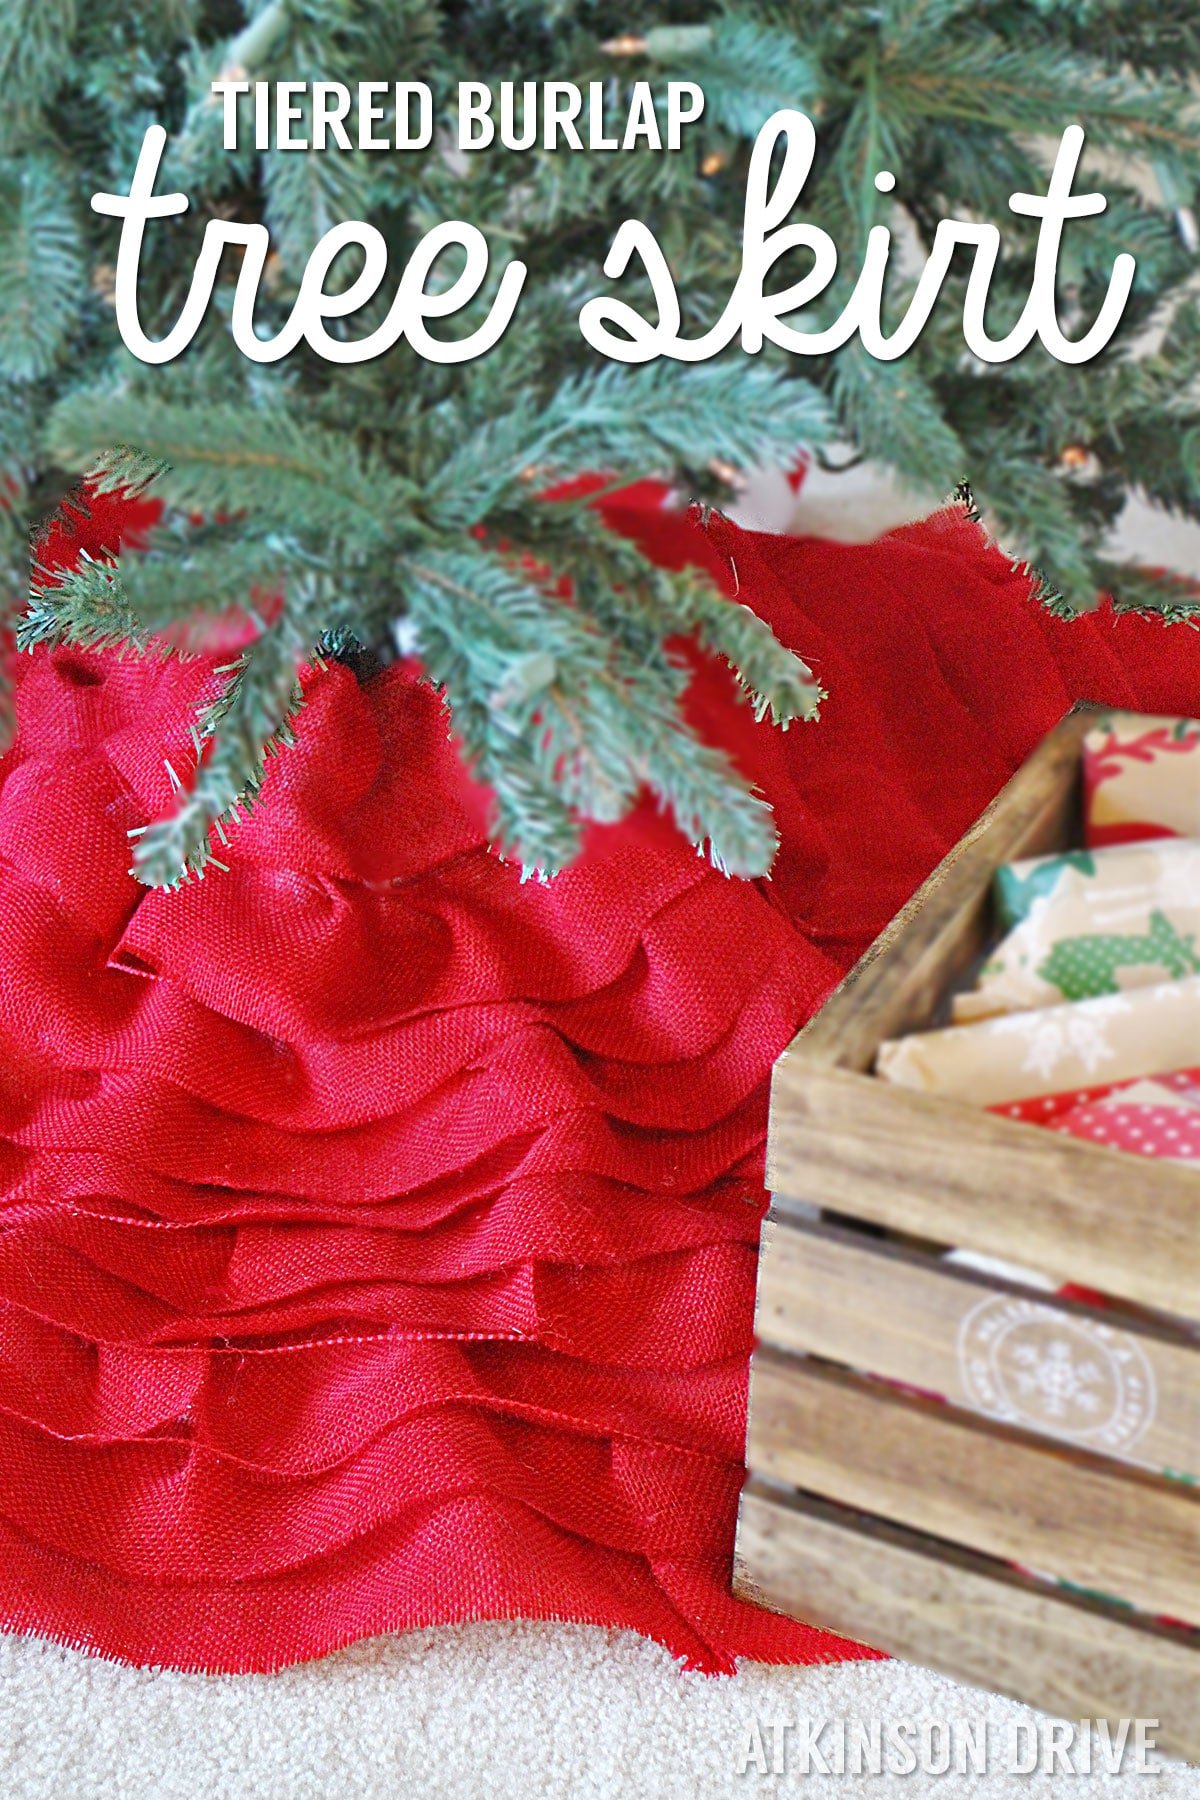
3. Once the tree skirt base is prepped, you’ll need to cut strips in the burlap that will created the tiered look on your tree skirt. I wanted my layers to be relatively wide, so I chose to cut my burlap at approximately 6″ intervals. The easiest way to cut your burlap in a straight line is to pull a string along the selvedge edge where you want to cut. If you’ve purchased your burlap at the store, the selvedge edge is perpendicular to the line they cut. This will give you a gap in the burlap to use as a cutting guide. If you’d like more detail on this method, visit the Clumsy Crafter.
4. Next comes the tedious task of gluing your burlap tiers onto the felt base. Start at the outer edge and work your way around hot gluing along the top edge of burlap – be careful not to burn yourself! Every once in a while you’ll need to fold the burlap to get it to follow the curve. If you want more of a ruffled look, add more folds as you go; just keep in mind that you’ll need more burlap if you want ruffles. Continue this process until you’ve covered all of the felt in burlap tiers.

This is one of those projects that takes a while to complete, but is totally worth it! And whether you choose colored, patterned, or plain burlap, this skirt will add a sophisticated-rustic touch to any Christmas tree!
This is Day 2 of our 12 Days of Christmas Decorations series … check out all of the posts here.
linking to these parties
 Loading...


I love is! It’s looks so pretty. I’m not crafty but I sure would like to have one like this. So I might just try it. Glad I found you on the Party in Your Pj’s Pinterest . Pinned this!
You should! It’s really simple. And if you don’t want to deal with cutting the burlap, you could always use burlap ribbon!