I have a confession to make…
I am a cheesecake snob.
*whew* it’s good to have that off my chest! When the husband and I started our low-carb diet, I told myself that it would be the end of all things delicious. And then I found a low-carb cheesecake recipe. My heart sang and I couldn’t wait to make this cheesecake and share it with you. Unfortunately, it didn’t live up to my expectations at all. The crust was pretty good, and incredibly easy to throw together; plus, my lemon topping was to-die-for! So, I am making a few adjustments to the low-carb recipe to make it delicious and not even close to low-carb. We all have to indulge every once in a while, right? The filling recipe is one that I made for some friends around Christmas {from Former Chef} and is to-die-for! Honestly, probably one of the best cheesecake fillings I’ve ever had! So, I’ve adapted that for this lemony cheesecake, but I’m leaving the crust as-is from the low-carb recipe. I hope you all enjoy this Spring-filled citrus-y delight!
Crust Ingredients:
1 C. Pine Nuts
1 C. Unsalted Macadamia Nuts
1 1/2 Tbsp. Grandular Sugar Substitute
3 Tbsp. Unsalted Butter, Melted
Filling Ingredients:
2 lbs. Cream Cheese, Softened
1 C. White Sugar
4 Eggs
1 Vanilla Bean
1/4 C. Milk
Topping Ingredients:
1 C. Sour Cream
1 Tbsp. White Sugar
1/2 tsp. Vanilla
Lemon Topping:
Lemon Pudding Powder
Milk
We’re going to start off with the crust. Preheat your oven to 350 degrees. In a food processor, pulse nuts and sugar substitute until finely ground. Add melted butter and pulse to combine. I found that my crust ended up resembling a nut-butter substance. It was more gooey-liquid than I anticipated. So, don’t be worried if yours ends up that way, too. Gently spread the mixture into the bottom of a 9″ springform pan. Bake at 350 for 10 minutes and then remove from the oven to cool. I let my crust sit for about an hour before filling. It’s probably not necessary to wait that long, but you do want to make sure it’s fully cooled before you add the cheesecake filling.
Turn the oven down to 325 degrees. Pour your milk into a small pot. Open up the vanilla bean and, using a knife, scrape out the “caviar” inside. Put both the caviar and the vanilla pod in with the milk. Heat until the milk is hot, but not boiling. Turn off the heat and let it all steep for 15 minutes. Remove the pod from the milk, and try to scrape out some more of the caviar. Whisk the milk to incorporate any extras.
Next, put your softened cream cheese into a mixer bowl. I always use my trusty KitchenAid mixer, and if you have one I would highly suggest using it! Add in the sugar, then beat until the sugar and cream cheese are well-combined and smooth. In a separate bowl, crack one of your eggs then slowly beat it into the cream cheese mixture. Continue this with the other three eggs. Turn off the mixer, and scrape down the sides of your bowl with a spatula as needed. Start the mixer up slowly and add in the vanilla milk until everything is well-combined with no lumps.
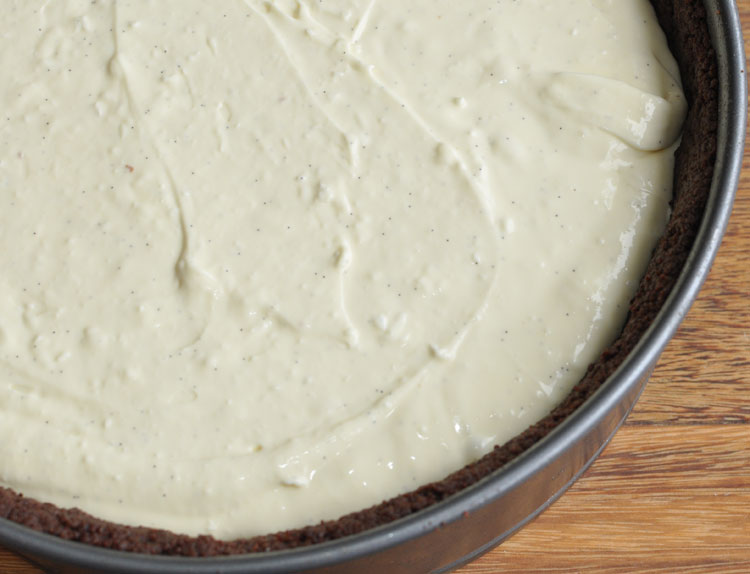
Pour the filling into the pan with your cooled crust. Place the pan on a cookie sheet and bake for 55 – 60 minutes at 325 until set but still somewhat soft in the center.
While the cheesecake is cooking, mix together the sour cream, sugar and vanilla for the topping. When the cheesecake is done, remove from the oven for 10 minutes {but don’t turn the oven off}. Spread the sour cream mixture on top and return to the oven for 10 more minutes. Allow the cheesecake to cool on a rack for an hour. Refrigerate at least four hours.
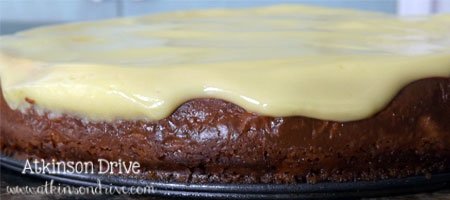
Next, you’ll need to make your Lemon pudding. Simply follow the instructions on a box of instant lemon pudding, whisking the milk and powder together. Refrigerate five minutes, until soft-set. Spread the lemon mixture over the top of your cheesecake. I used a little more than half of a big box to cover the cheesecake, but you can use as much or as little as you’d like. *PS – Jello brand lemon pudding tastes like girl scout Lemonades – perfection!
Refrigerate another hour or so.
This cheesecake can be made up to two days in advance, so if you’re not ready to serve it yet, just cover up the Springform pan with some plastic-wrap or foil and keep refrigerated until serving time.
When you’re ready to serve, just remove your cheesecake from the fridge and take off the outside part of the pan. If you’re serving this for Easter, or another Spring event, try serving it on a white platter adorned with yellow ribbon, or plastic Easter eggs!
Spray on some whipped cream for a creamy & delicious topping.
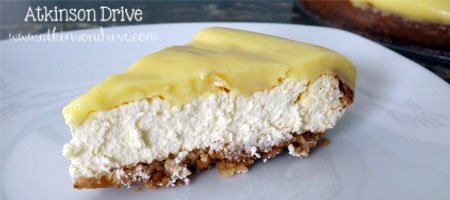
This Lemony Vanilla Bean Cheesecake is the perfect Spring treat. The creamy richness of the filling pairs well with the tangy citrus notes of the lemon pudding, and it all combines with the nutty flavor of the crust to create a deliciously refreshing cheesecake!






 Loading...




















Looks like the perfect spring treat!
Looks delicious – my husband is also on a low carb diet at the moment, so will have to make this for him and his sweet tooth.
Kate x
http://www.kateathome.com/
This filling recipe isn’t for the low-carb cheesecake. But, it should be pretty easy to adapt it back. Basically, switch out the milk for whipping cream and the sugar for a granulated sugar substitute, and it should be pretty decent.
Oh yummy! :) Thank you for linking this up to Rustic Restorations Weekend!
Amazing. I’d love to have you link to What to do Weekends Party. Have a great weekend. Linda
http://www.craftsalamode.com/2013/03/what-to-do-weekends-9.html
This looks delish! That crust, yum!
Two of my favorite flavors, vanilla and lemon. How could you go wrong? I’ll have to give this a try.
This looks sooo goood! Thanks for sharing at Monday Funday!