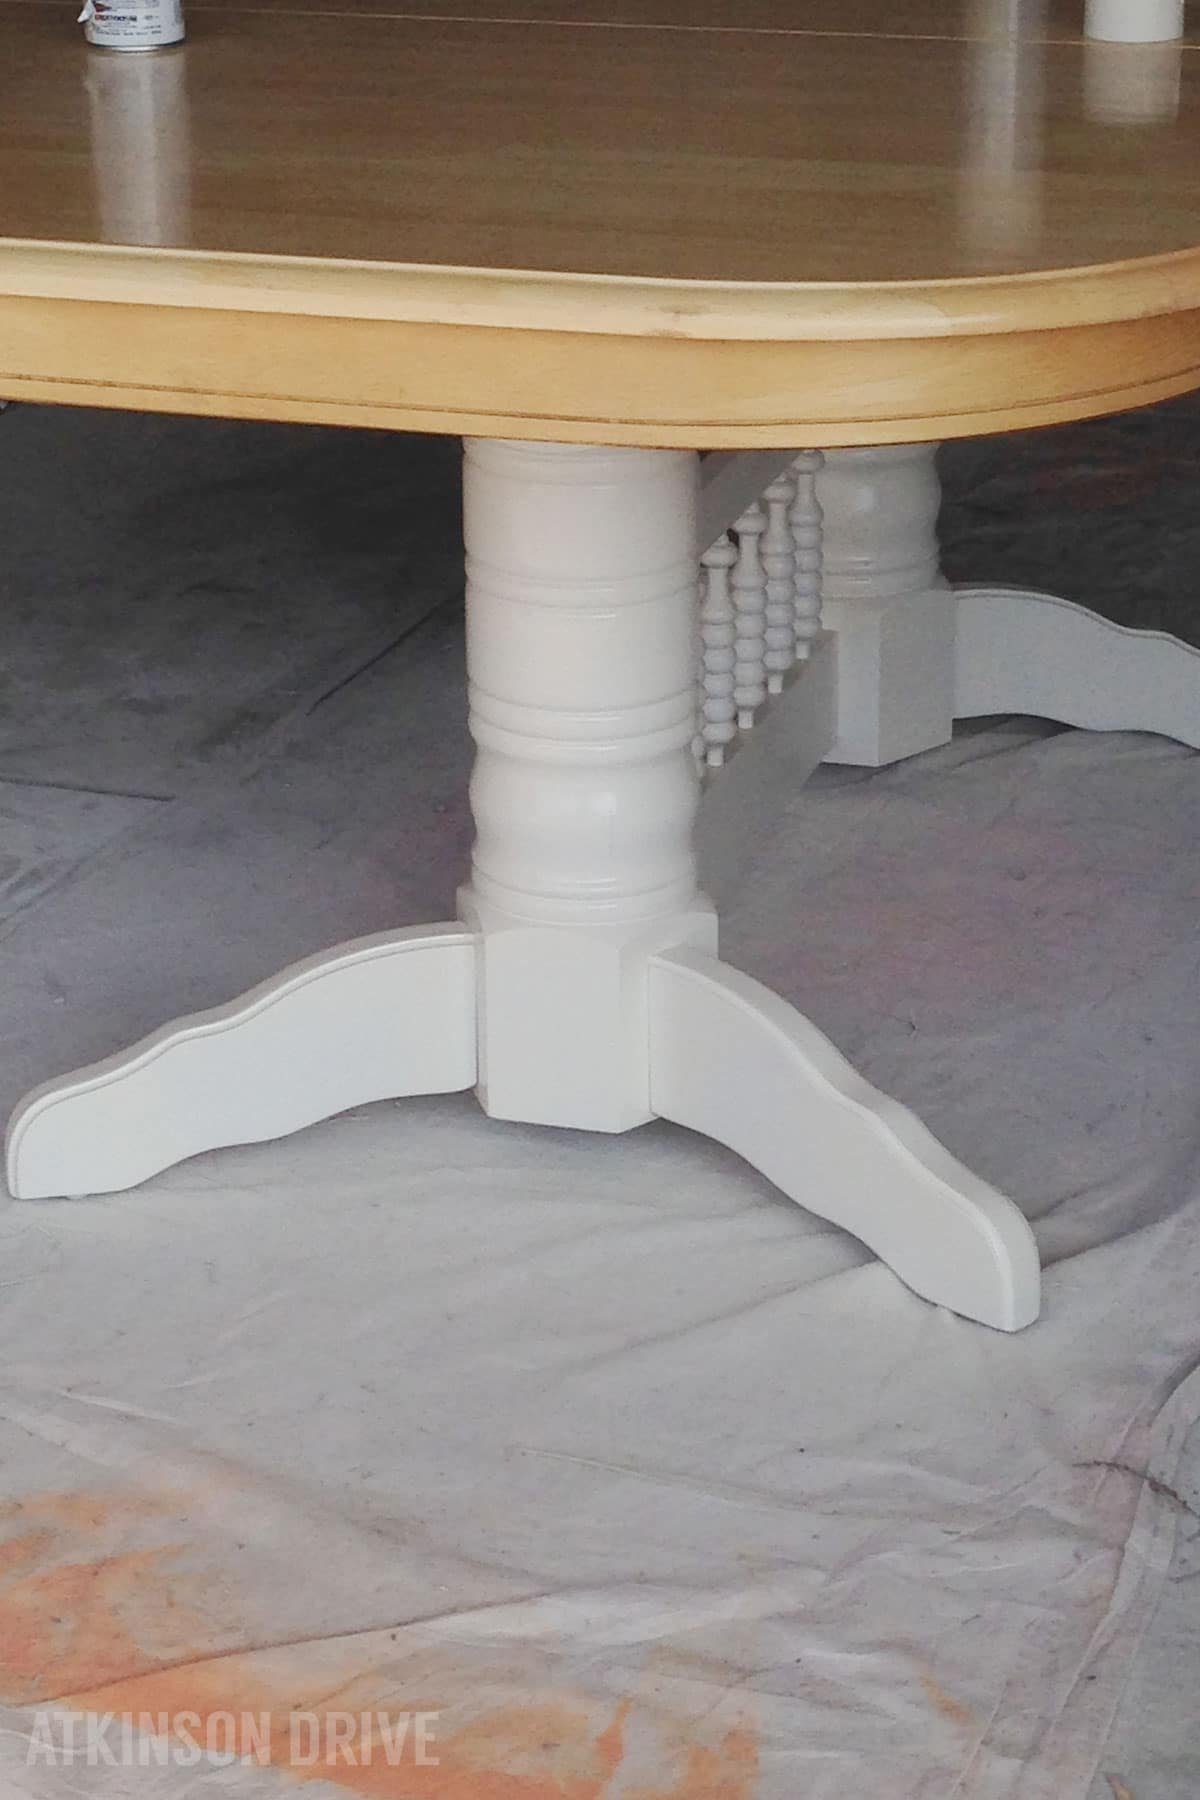
I’ve known for quite some time now that I wanted to try a two-toned white and stained-wood look with the table. Since it was real wood, I thought it would be gorgeous to stain the top a dark color while painting the bottom with an off-white.

I used several coats of my favorite spray paint…Rustoleum Painter’s Touch 2x Ultra Cover in “Primer” and “Heirloom White.” My original plan was to distress the bottom just like I had done with my side tables, but I was afraid of how well that would stand up to the every day wear-and-tear that a dining table gets. Eventually I might try some distressing ink, but for now I like the cleaner look of the plain white base. (Sorry for the terrible iPhone photo).
Once the base paint had cured, I proceeded to sand and sand and sand the top. Unfortunately, whatever coating was put on it originally must have seeped into the wood over the years or something, and I just couldn’t get the stain to stick no matter what. By all accounts, it was a disaster … and I became more and more frustrated with everything I tried. I even purchased some chemical stripper to get the coating off, and nothing worked!
I finally came to the conclusion that I either had to paint the tabletop (which was basically not an option in my book), or build a new top to attach to the base. You might ask why I didn’t just buy a new table at this juncture. But, real wood tables aren’t cheap, and for the size and style I wanted it would have been incredibly expensive to replace it all together. To build a new top only cost me about $40…so it was worth it!

I went to Lowe’s and purchased six 8-foot pieces of 2x8s to actually use as the tabletop. My husband helped me remove the original top (which was super heavy). Then, I attached scrap pieces of wood from around our garage (cedar fence planks) to the table base … this is what I screwed the top pieces to.
Before I attached the 2x8s to the base, I distressed, stained, and coated them. There were several methods I used to distress the planks and (hopefully) give them a more natural look. Luckily for me, several of them already had scratches and what not from the transport process. Here’s what I did to give the table a lightly beaten-up look:
- Took a paint scraper to the edges to gouge chunks out of the wood.
- Took a sock full of different size screws and beat the top with it to add divots.
- Beat the wood with a hammer to add some indents.
(If you’re afraid to do this, use a rubber mallet) - Used a small, round-ish screwdriver to add “wormholes.”
After all of that fun, I sanded the table down to make sure that, while it was distressed looking, no one would actually hurt themselves on a jagged piece.
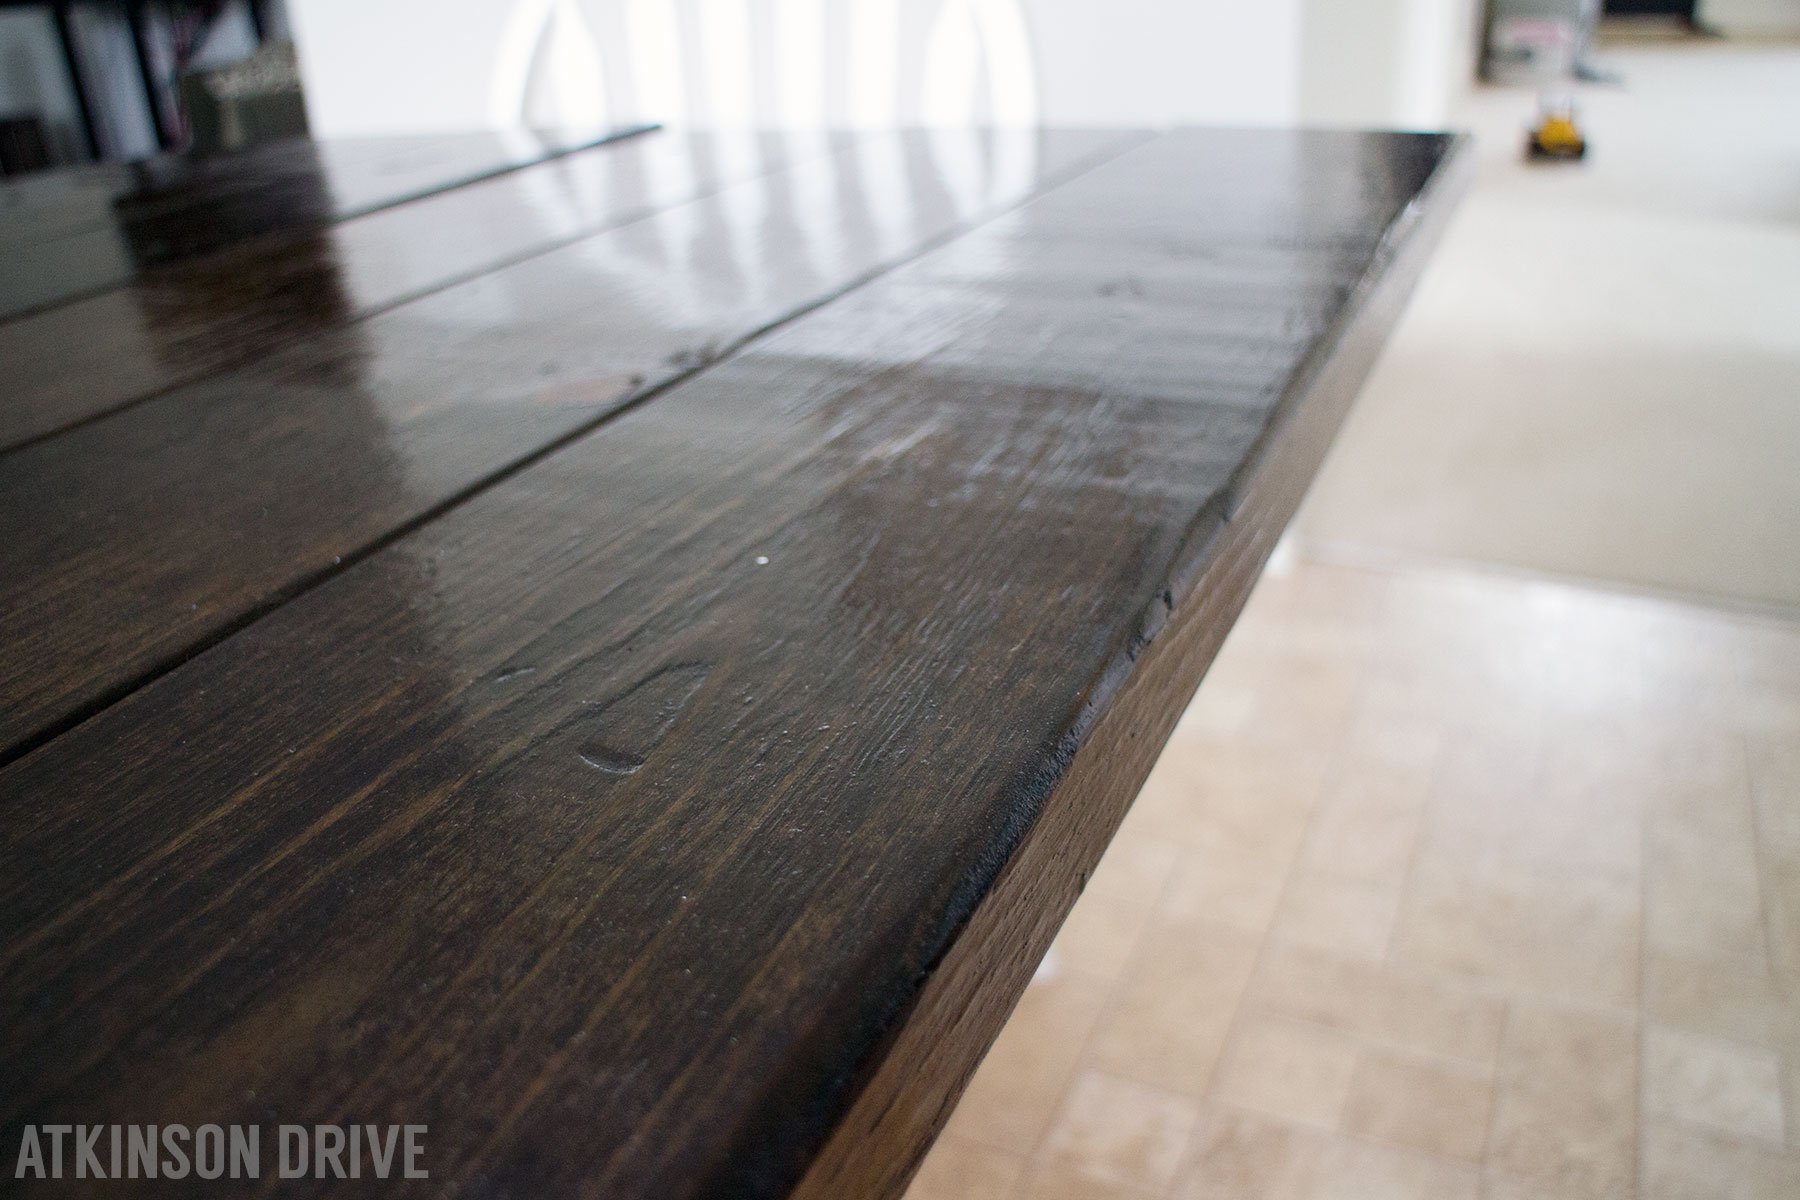
Next, I stained all of the wood with MinWax stain in Jacobean. I followed the instructions pretty much to the letter, but not completely. In the interest of time, I put the original coat of stain on and left for about 15 minutes – which is what the can calls for. But then instead of wiping it off, I added another coat in places where I felt it was needed (like over the knots). After another 15 minutes, I wiped the stain off. Once the stain cured completely, I sealed the wood … which is the most important part of the whole process.

It took me a long time to decide how I wanted to seal the table top. When I was a little girl, my step-dad formulated a coating for wooden boats called Bristol Finish that was incredible. It lasted for years and didn’t yellow – could basically stand up to anything (I’ve literally seen people try to light it on fire and smash it with hammers). Since that time, it’s come a long way and the business has added new items … but it’s still a great, long-lasting product. I really wanted to use it for my table top, but I was, honestly, a little nervous about it being too difficult and time-consuming to apply.
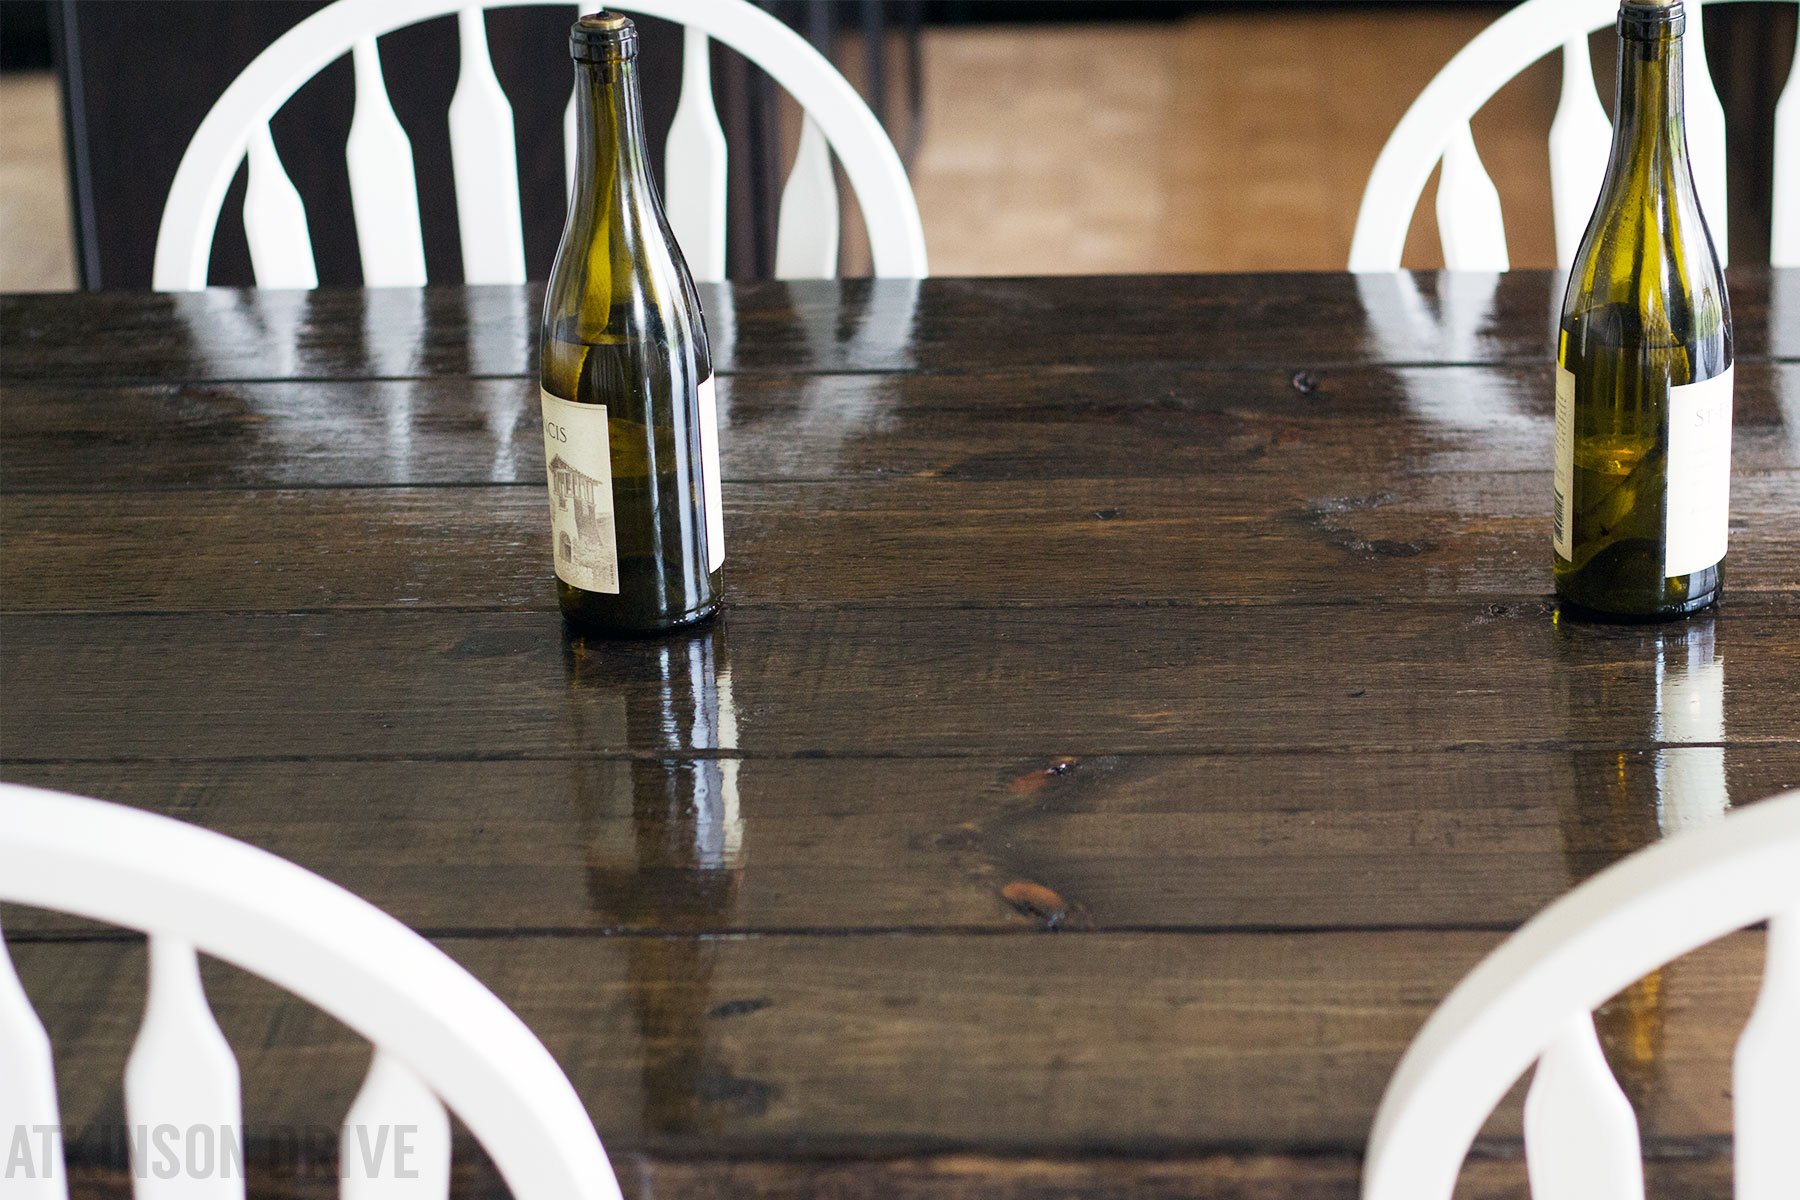
I went for it anyway, and I’m loving the result! Since this is an indoor table and won’t have to stand up to near the beating that a boat or wooden floor does, I opted to go for two coats. The Bristol Finish was easy to apply, and I used the “wet on wet” method which goes quickly because you don’t have to let it cure between coats. Once the Bristol Finish cured, my husband and I brought the table into the house in separate pieces: the base first, and then the top wood slabs.
A few notes on Bristol Finish:
- I opted to use a glossy finish on my table.
Bristol Finish also carries products that are satin. - The Traditional Urethane needs to be applied in a well-ventilated area …
read: outside or in an open garage. - Classic Clear Urethane can be applied indoors.

Once inside, all we had to do was screw the pieces onto the base, and we had a table! It grows on me more each day. I couldn’t be more in love with the look, and it really has stood up well so far! We have a few more finishing touches to add: a “bib” of sorts to cover the under-workings of the table, metal strips on the under-side to make the ends a little more sturdy, and the chairs have to be replaced … but that will come eventually!
I am so thrilled with how my table turned out, and I want to give you the opportunity to refinish your own piece of furniture! So, enter below to win a Bristol Finish Traditional Amber Urethane Quart Kit (an over $60 value)!!! :-)
 Loading...


Amazing the products that are available for the DIYer. My daughter has a bar in her basement that I’d love to transform… this is exactly what I need! Thanks so much for the opportunity – my fingers are crossed!
I would love to try and make a crate for my dog that doubles as a side table. I think this would be perfect for that project.
My bench in the mudroom could us this!
WOW, I love how this turns out and the top you built looks amazing! Thanks for sharing at The Makers!
Your table looks incredible! I have about five upcoming furniture makeovers that this kit would be perfect for! :)